

Getting started with 360 Virtual Tours is easier than you can imagine! Let us begin by outlining the five simple steps needed:
- Plan your shots around the property
- Prepare your camera and monopod
- Connect your camera to your mobile
- Upload to Panopedia
- Add Hotspots (optional but recommended)
1. Planning your shots
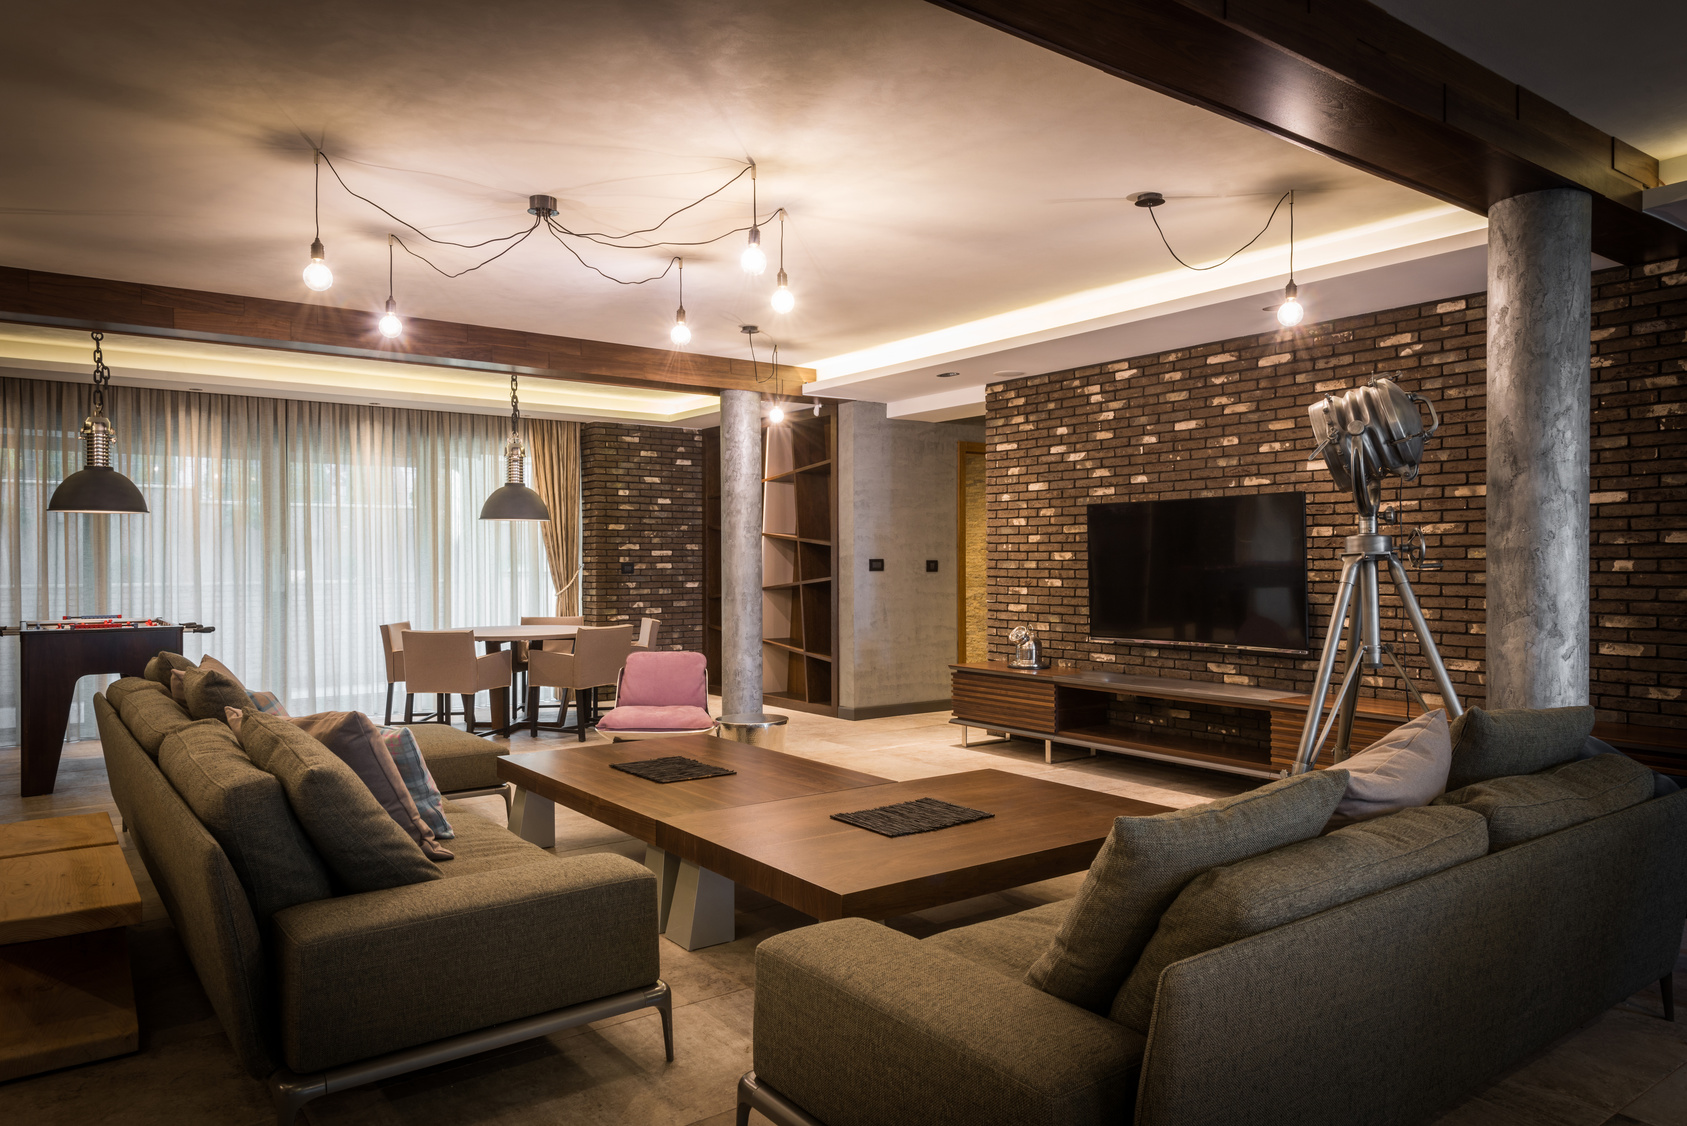
For convenience, we would want to order our shots in the manner viewers would typically enter and view the place. Let's take a look at this example:

From this example, shots should be taken the following order:
- Entering the main hall
- Main hall
- Master bedroom
- Main toilet
- Common room
This order is the most natural, as viewers will typically wish to start visiting the areas that is most prominent and interesting. Hence, the first shots should always be at the main hall. For most properties, it will be the largest and best furnished area, that's why we have 2 shots here. Following, will be the areas of comfort, starting with the Master Bedroom, Main toilet and followed by the Common room.
Of course, if you've got a separate kitchen, or more rooms, we can add the shots accordingly, though the kitchen should take priority over the bedrooms. Even if you did not take the shots accordingly to this order, not to worry! Once you uploaded to Panopedia, you can reorder them later.
In rooms where only 1 shot is required, try to position your camera at the center of the room, or as close as possible. Ideally we would like the distance from the wall to the camera to be equal all around.
2. Prepare your camera and monopod
When entering or even before, it is much more efficient to have you 360 camera firmly attached to your monopod, and extending it after. Make sure the base/legs is firmly secured before beginning your shoot. You don't want it tipping over!
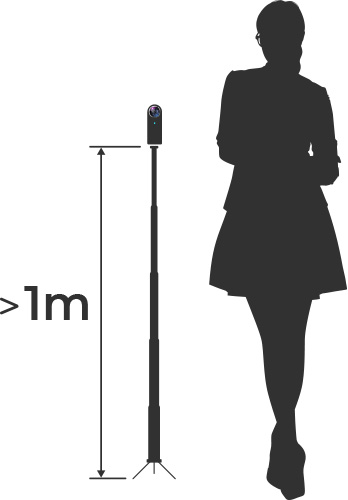
Preferably, the height should be at least 1 meter from the floor, or higher. Try not to let it exceed typical eye level or it will look quite unnatural. Typical eye level height is around 1.7meters, but it is perfectly fine as long as it is above 1 meter!
3. Connect your camera to your mobile
Most 360 cameras have a companion application available on smartphones, iPhones or Android. Depending on the camera model, connect to it using WiFi or Bluetooth. Do refer to your camera documentation on how to connect.
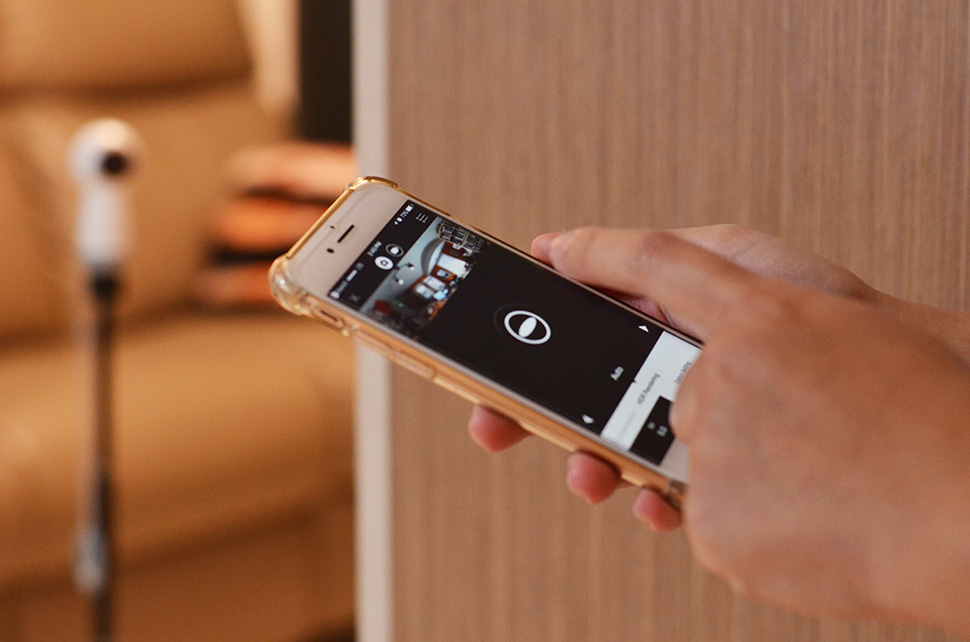
Once connected, take a 1 or 2 test shots to make sure everything is working fine. Make sure all the lights are on, and the photos look reasonably good. Position your camera in the points you choose, step away out of sight, using your mobile as a remote to preview, and take the shots!
4. Upload to Panopedia
Login to your account, or click here to create a free account, go to Panotours and click on New Panotour. Creating a Panotour takes 3 simple steps:
- Write the title of your Panotour, like the name of the development, etc.
- Upload your 360 photos
- Add hotspots to connect
There are many interesting features in each step you may use to enhance visibility and interactivity, but for this article, let's just take the fastest route.
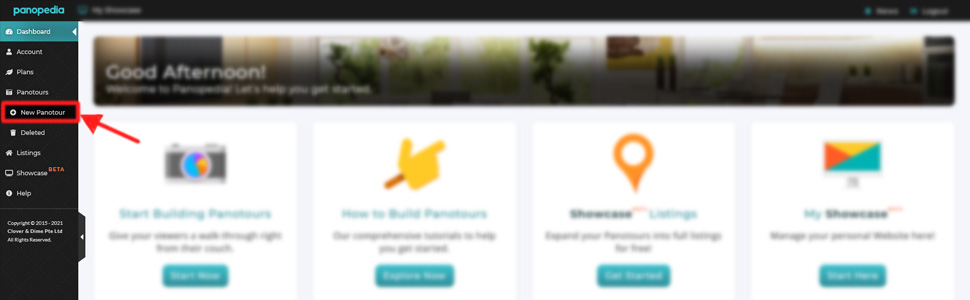
Once you clicked on New Panotour, you will be asked to enter various details. At the bare minimum, enter your title, and click on the Save button. On the next page (which is step 2 above), click on the upload area to upload the photos you took. All these can be done on your mobile, so you don't have to transfer the photos to your computer. If you are satisfied with the order, you can simply click on save. If not, you can also drag the scenes around to change the order.
The moment you uploaded your 360 photos, your Panotour is now viewable!
5. Add Hotspots
Hotspots are interactive and informational points in your Panotour for your viewers to interact with it. At the very least, we should add Scene hotspots to "connect" different rooms together, allowing your viewers to walk through the house. Even if you did not add any hotspots, the Panotour can still be easily explored with the scenes or FloorPlan (active subscription required) menu.
5.1 Mobile
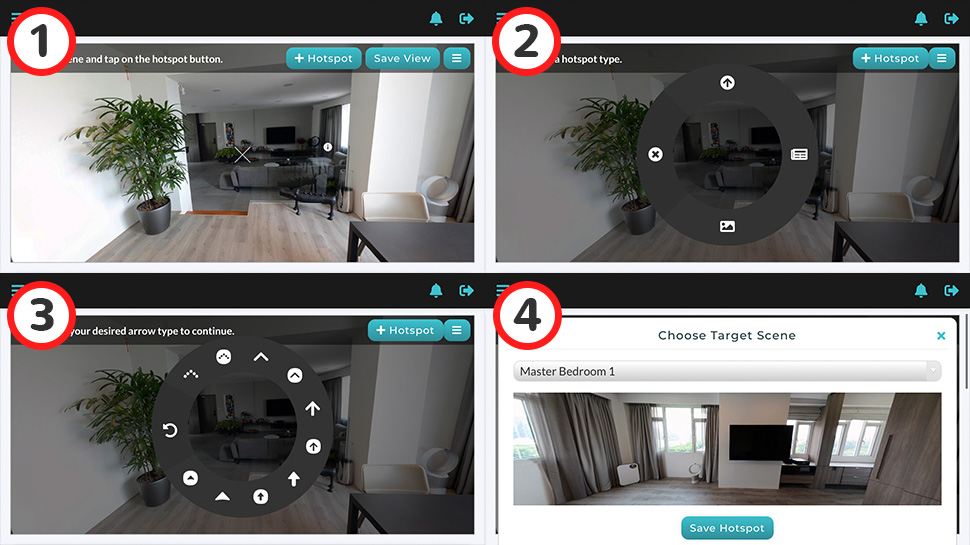
You can add hotspots by moving the scene around with your fingers to find the spot you wish to add, with the crosshair as a reference.
- Tap on the + Hotspot button, and a menu will appear.
- Tap on the Top arrow option
- Choose an arrow type, and tap on the Save icon
- From the dropdown box, choose the scene you wish to link to, and tap on Save Hotspot.
5.2 Computer
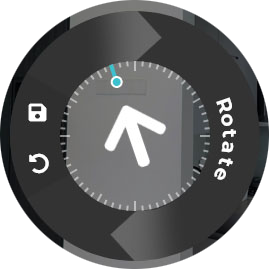
On your laptop or computer, you can add hotspots anywhere in the scene (move it around to find your desired point), and right click with your mouse. The menu is exactly identical to mobile, although you have an additional option to rotate the Arrow too.
You're done!
That's all, you have just created your first 360 Panotour on Panopedia! If you do not have an account yet, feel free to register here. You can always create up to 3 Panotours with a maximum of 3 scenes each for free accounts. At anytime you no longer need any, you can always simply delete one of them to free up space to create another. Hope you will enjoy building Panotours as much as we building the easiest and fastest 360 Panotour Builder for you!