

There are many features in Panopedia you can use to make your 360 Panotours more interactive to viewers! Using these easy-to-use features, you can enhance your viewer's 360 experience, making them fall in love with the place before even stepping in there. Let us start with the various features available:
- Auto-rotate
- Scene Looping
- Call to Action
- Ambient Music
- Scene Naming
- Photo Enhancement
- FloorPlans
- Social Sharing
1. Auto-Rotate
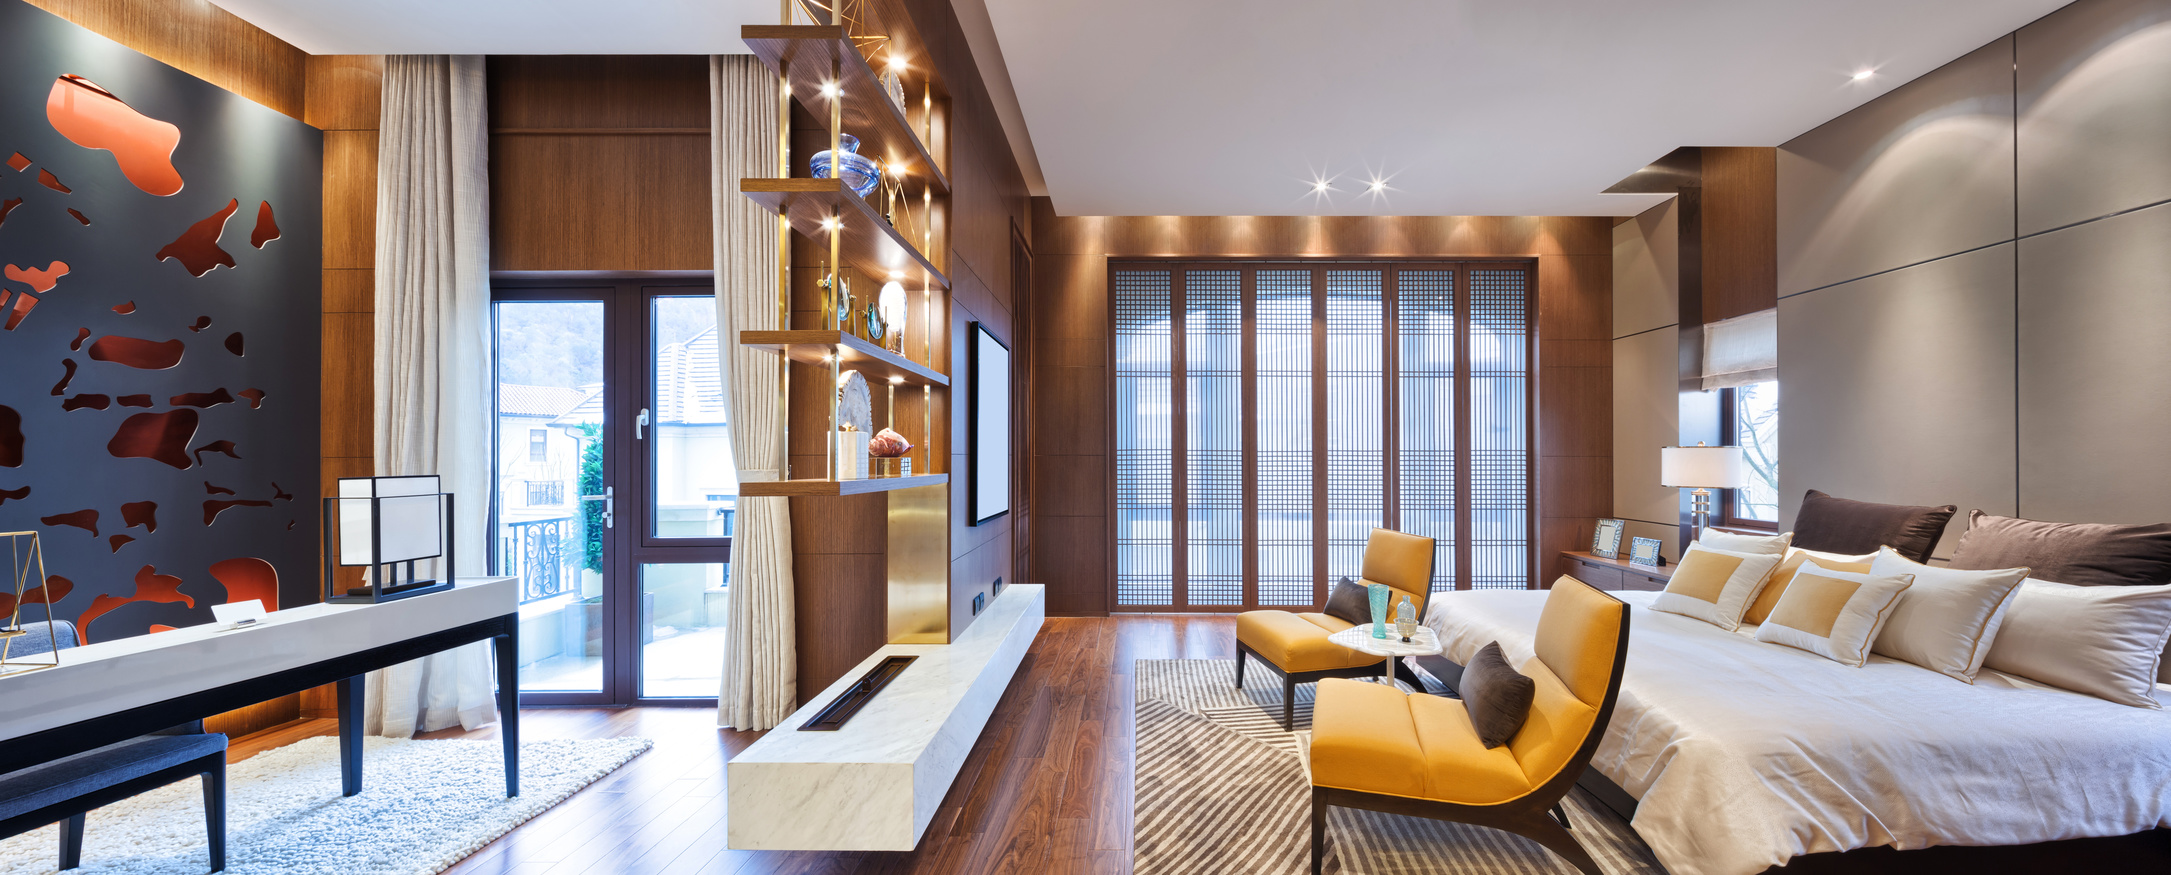
Have you noticed that most 360 Panotours, the scenes are stationary? This is normal, but we added an auto-rotate feature to make it seem much more dynamic. When left on it's own, the scene moves slowly and steadily, making it seem like a video. Best enabled when your Panotour is displayed on a large screen, maybe at a storefront or a road show. Imagine if auto-rotate is not on, it will simply look like a nice but static image, not as eye catching as when it were on.
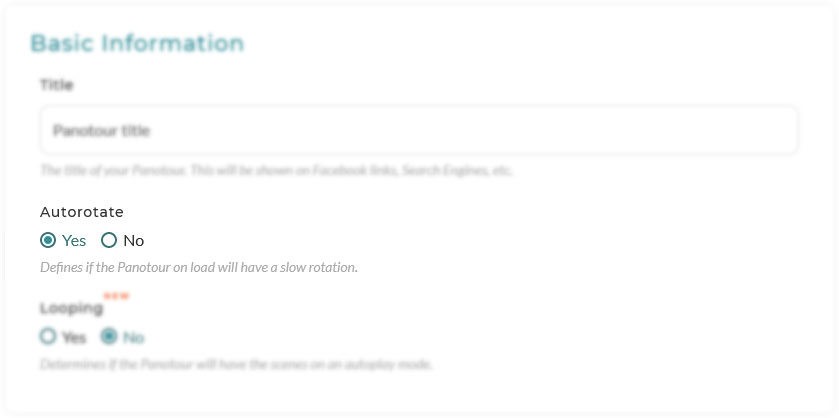
When there is user interactivity, such as mouse clicking or dragging, the auto-rotate pauses and becomes active again after 5 seconds. To turn on auto-rotate, when creating or editing Panotours, toggle Auto-Rotate option to Enabled.
2. Scene Looping
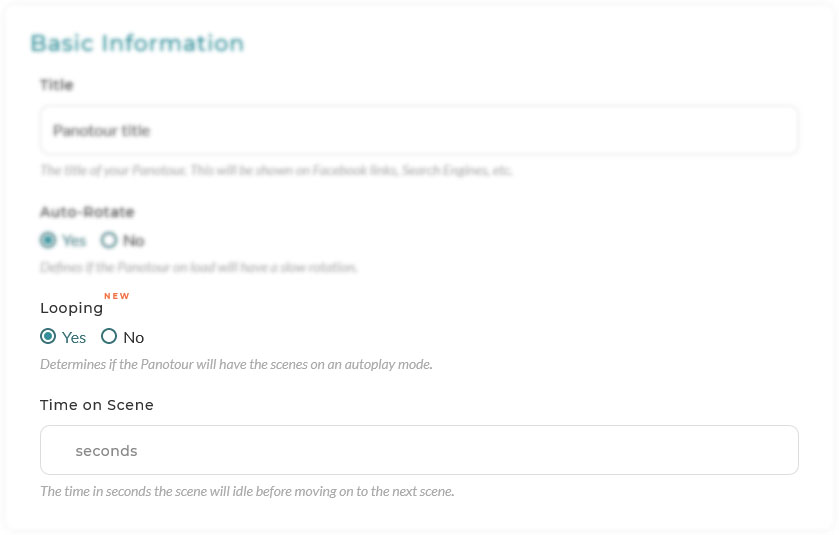
You can further enhance your 360 Panotour on display, by enabling Scene Looping. Best used with Auto-Rotate, each scene will linger on the screen for a time determined by you, recommended to be 30 seconds. After this 30 seconds is up, it will automatically jump to the next scene. If at anytime there was interaction, like clicking or rotating the scene, this timer pauses for 5 seconds.
This effect, when combined with Auto-Rotate, gives a dynamic video-like view to your Panotours! To enable Scene Looping, just toggle Looping to Yes and enter the Time on Scene in seconds. We recommend 30 seconds, but you can set it to be up to 300 seconds.
3. Call to Action
A wildly popular feature, you can put in a headline with a brief description of the Panotour, and then enticing the viewer to call you straight from their phone! The Call-to-Action feature appears when you are creating the Panotour, and all you have to do is to enable it. Once it is enabled, you can enter your desired headlines and text. You can also choose from three button types, to call, email or a link to a different URL. For the call button type, viewers are able to call you straight from the Panotour.
When creating your Call to Action, emphasize on the key selling points of your property. With the right words, you can compel them to take action by contacting you right away!
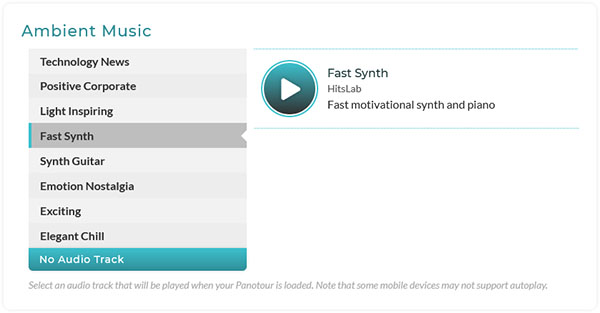
4. Ambient Music
You can have nice and relaxing background instrumental music added to your Panotours. Choose from 8 audio tracks providing ambient music when the Panotour loads, setting the mood of your viewers as they are viewing the property! Make your selection from exciting upbeat tunes to a relaxing mood, available when you are creating your Panotours.
All the audio tracks we provide are fully licensed, and carefully chosen for you. You can also enable this feature for Panotours you created in the past as well. When choosing the tracks, you can listen to them to choose the ideal track to set the right atmosphere for your viewers!
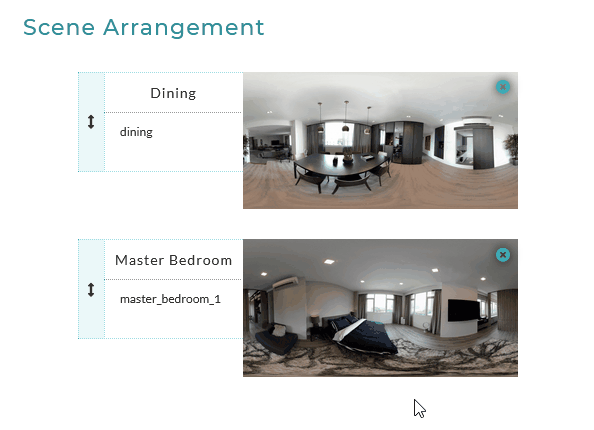
5. Scene Naming
Very important when creating a Panotour, as it allows your viewers to navigate through your Panotour easily via the menu, even when you have hotspots created. Hotspots will also take these names, so make sure you don't skip this step!
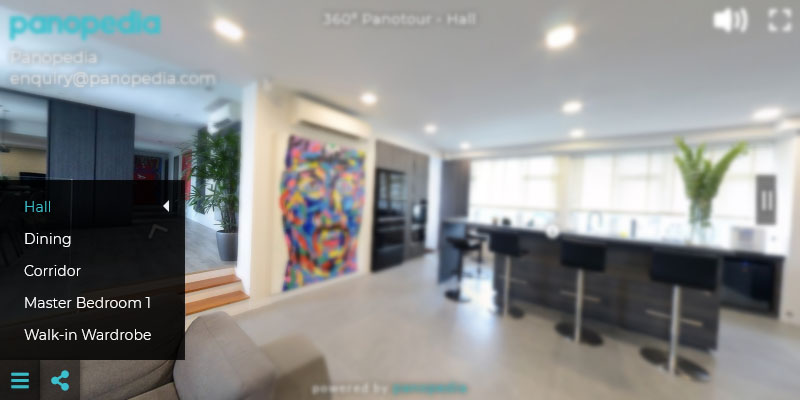
Naming your scenes is available right after you uploaded your 360 Photos. You can also reorder them as you wish, simply by dragging them with your mouse up and down.
6. Photo Enhancement
Sometimes, you may have taken shots and realising after you have left, that the photos are not optimal? Of course, there's a chance that you can go back and take another, but most of the time that means hassle and time wasting. You can enhance your photos right in Panopedia, without even using Photoshop! Not just to correct errors, we have included tools for you to improve your image quality to give your 360 photos a much more vibrant look.
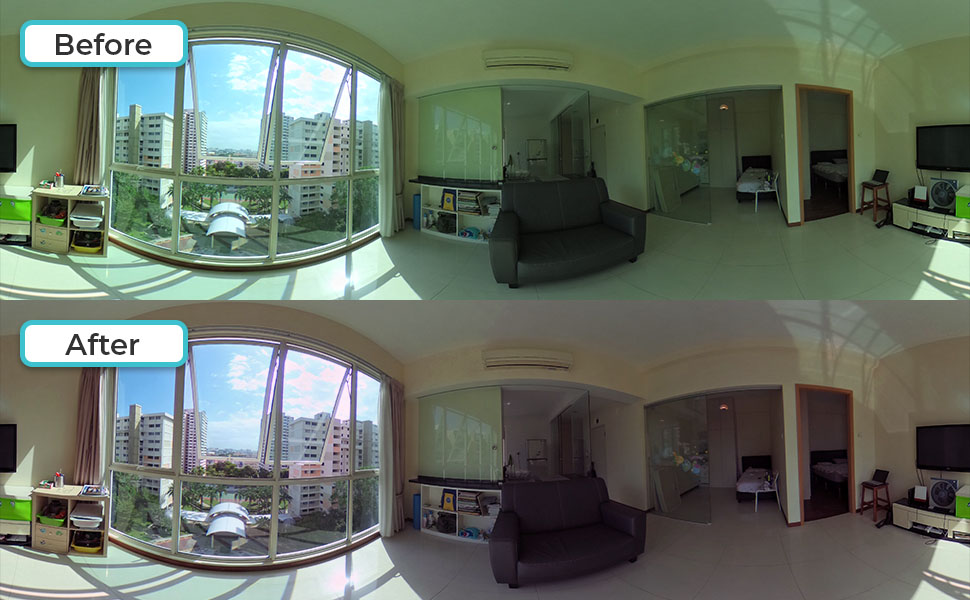
Features include correction for lighting, for example if it is too dark indoors or too bright outdoors, enhancing colours of the photo to make it more vibrant and saturated. You can also correct the primary colours (Red, Green and Blue) to make it look more natural. Although most of the times, the auto settings in your camera works quite well, some basic enhancement can further improve the image!
Photo enhancement is available after you have uploaded your 360 photos, and straight in your desktop browser or even your smartphone.
7. FloorPlans
Instead of the default Scene Menu, you can upload FloorPlans to help your viewers navigate through your Panotour. FloorPlans gives your viewers a layout of your property, and you can add points where they can click, to move to their desired scene.
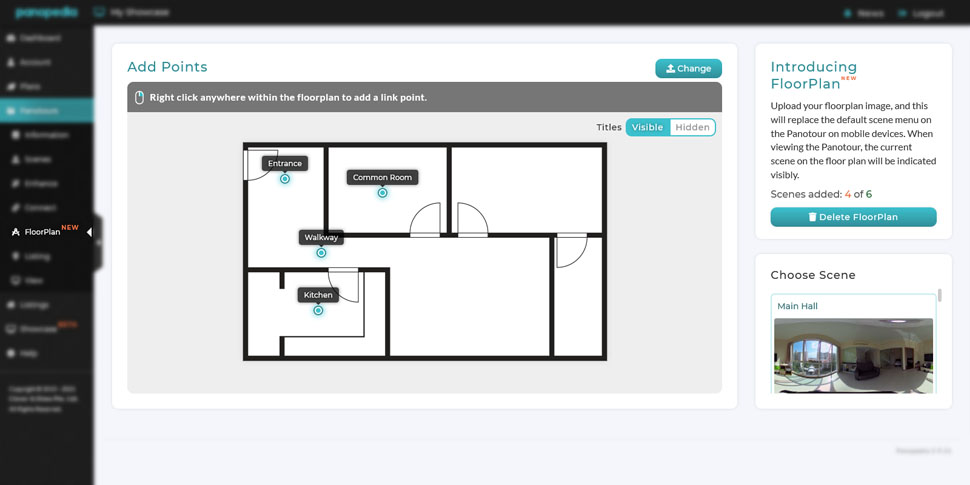
Uploading a FloorPlan is available after you have added Hotspots. After you have uploaded the FloorPlan, you can add link points by right-clicking on it, and selecting the right scene. While you are adding link points, There will be indicators to tell you how many of the scenes have added to the FloorPlan, so you won't make a mistake of adding a scene twice.
The FloorPlans feature is only available to subscribers of select plans.
8. Social Sharing
Creating a 360 Panotour means you want to get views, and to get views, one great way to do it is by sharing on Social Media and sending it to everyone who matters! Before we go further, start by setting your username. Why should we set our username? Because it shows up on your Panotour link when you send it to people. Instead of www.panopedia.com/joeydoe1293/panotours/0sjd21, you can have www.panopedia.com/joey/panotours/0sjd21, which though slightly shorter, is so much better.
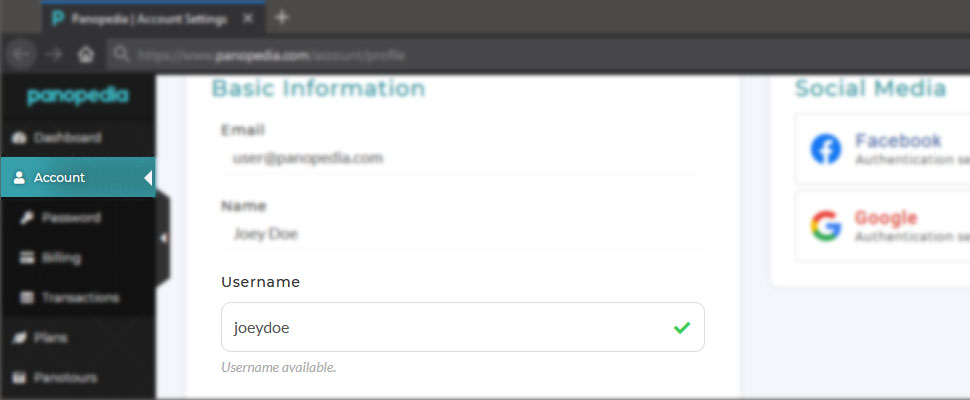
To set your username, go to Account, and choose a Username. Setting a username enables you to have new links for your Panotours, but your existing links are not affected at all. Meaning, those Panotours you have sent or embedded into websites will still show as normal.
There are a few ways to share your Panotours. First, you can simply share the link to your Panotour via messenging apps such as Whatsapp, WeChat, Messenger, or SMS.
To share on Social Media, you can also simply take your Panotour link paste it to whichever Social Media platform you use, such as Facebook, LinkedIn, etc. You can also use the Social Share menu located at the bottom left of your Panotour, to instantly post it.
When attempting to share on messaging apps, an image preview will popup. You can change this image easily when creating or editing your Panotour, by uploading one where it says Featured Image. By default, when this is not uploaded, your first scene is used.
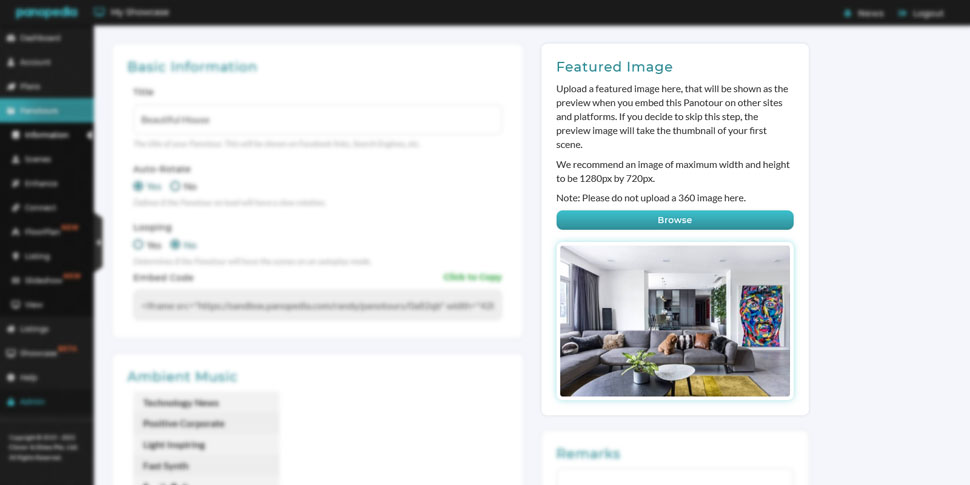
The best time to take your Featured Image is when you are doing your 360 photoshoot, either at the start or at the end of it, and simply use your smart phone's camera to take a view of where you think is the most attractive.
Conclusion
We hope these features and more will help you make the most out of your 360 Panotours! We have more features coming soon, and we always want to hear more from you on what else you wish to see. Do let us know using our contact form here!